


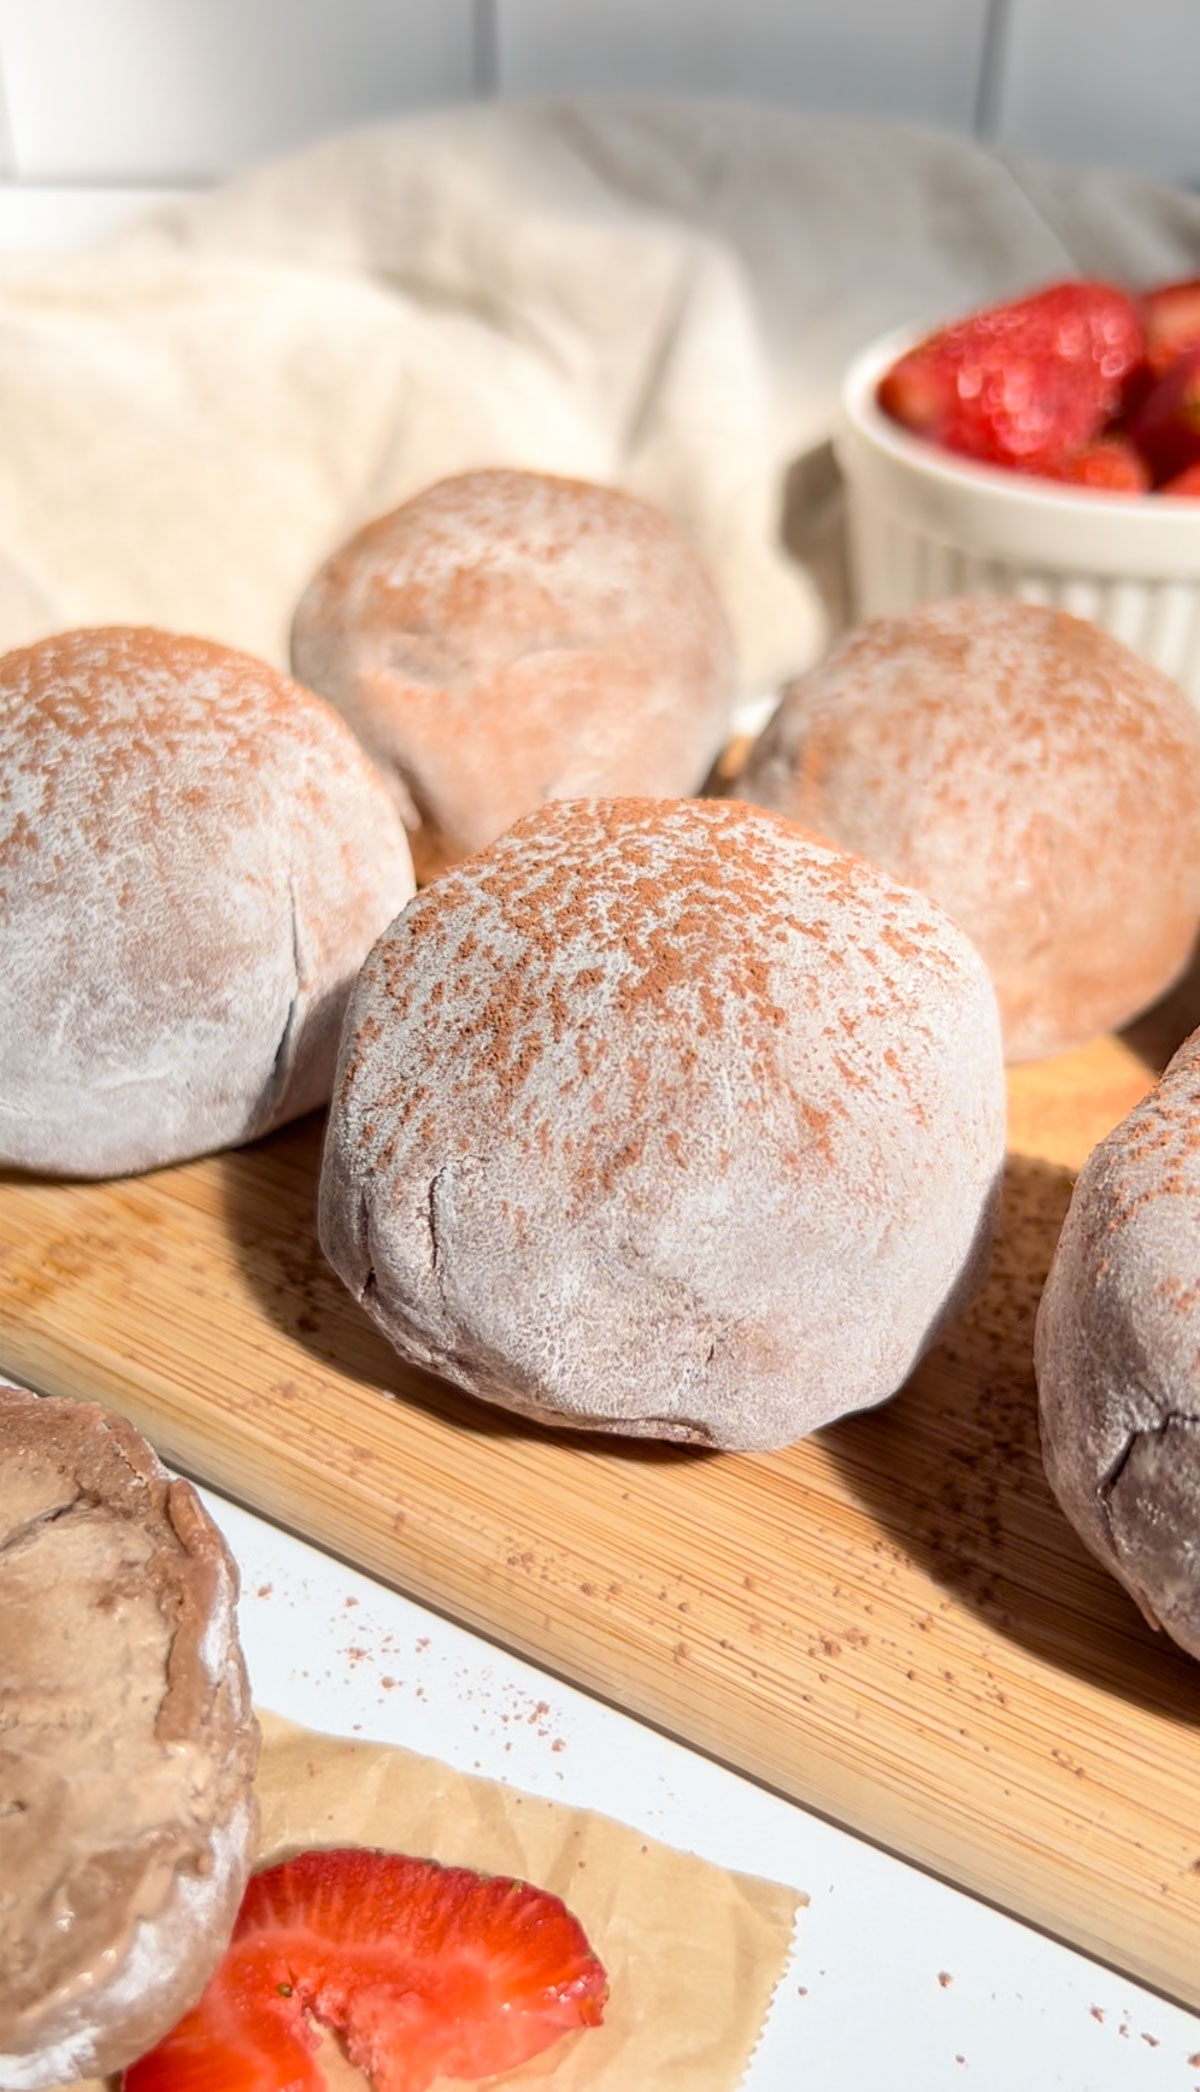
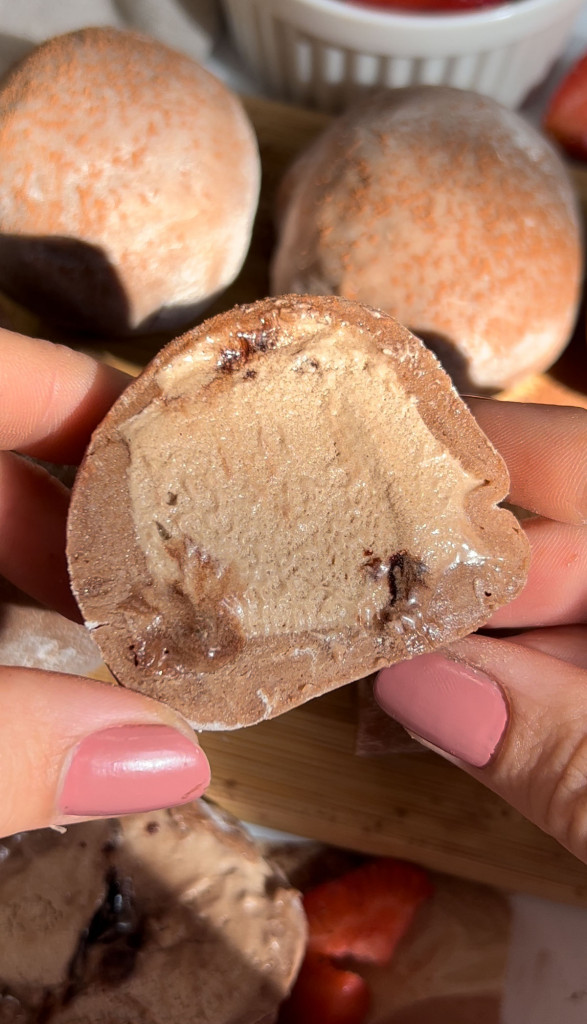
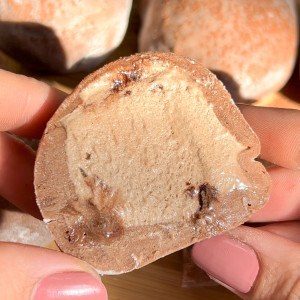
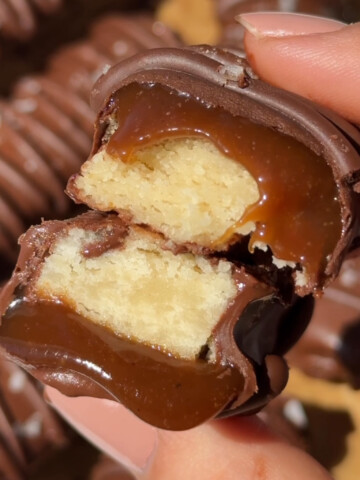
This chocolate mochi recipe has the best chewy texture and chocolate flavor. It tastes like a giant chocolate marshmallow with a creamy filling, and it's actually surprisingly easy to make too.
What is mochi?
Mochi is a Japanese rice cake. It has been eaten in Japan for centuries, and in recent years it's become more popular in the US, and for good reason!
Traditionally, Japanese mochi is made at the start of the new year in an annual tradition called mochitsuki, where people pound the rice to make the mochi. Here is a great article with more details about the tradition of mochitsuki.
Mochi is most commonly eaten in the US in the form of mochi ice cream. Mochi ice cream is a ball of ice cream enclosed inside a sweet and chewy rice cake. It has the perfect soft outside layer with a delicious cold and creamy middle, and as far as desserts go, it really doesn't get better than mochi!
I made this mochi vegan, but if you are not vegan, you can simply replace the vegan ingredients with the regular versions. I absolutely love mochi, but it is almost impossible to find a dairy-free version of them anywhere, so I decided to make my own version. Whether you make your mochi vegan or not, it will taste absolutely delicious and look adorable either way!

What flour to use for mochi
Mochi is made with a special sweet rice flour, which is also called glutinous rice flour or mochiko. It is the key ingredient in making the chewy mochi texture and it's also used in other Korean, Filipino, Hawaiian, and Chinese dishes.
You can find it in the baking section of many grocery stores, or order it online. I personally could not find sweet rice flour in my grocery store, so I ordered a bag on Amazon. This is the one that I used in my recipe. I've made several batches of mochi with it, and it works great!
What you'll need to make the chocolate mochi recipe
Dry Ingredients
- sweet rice flour: as stated above, sweet rice flour, (also called glutinous rice flour or mochiko) is a special flour used for mochi. You can find it in the baking section of many grocery stores, or order it online.
- sugar: I used coconut sugar, but any granulated sugar will do.
- cacao powder: you can use regular cocoa powder or raw unprocessed cacao powder (which is what I used). Either will work.
- cornstarch: to dust the flouring surface.
Wet Ingredients
- non-dairy milk: any kind will work such as coconut milk, oat milk, soy milk, etc. If you are not making your mochi vegan, whole milk will also work.
- dash of vanilla extract
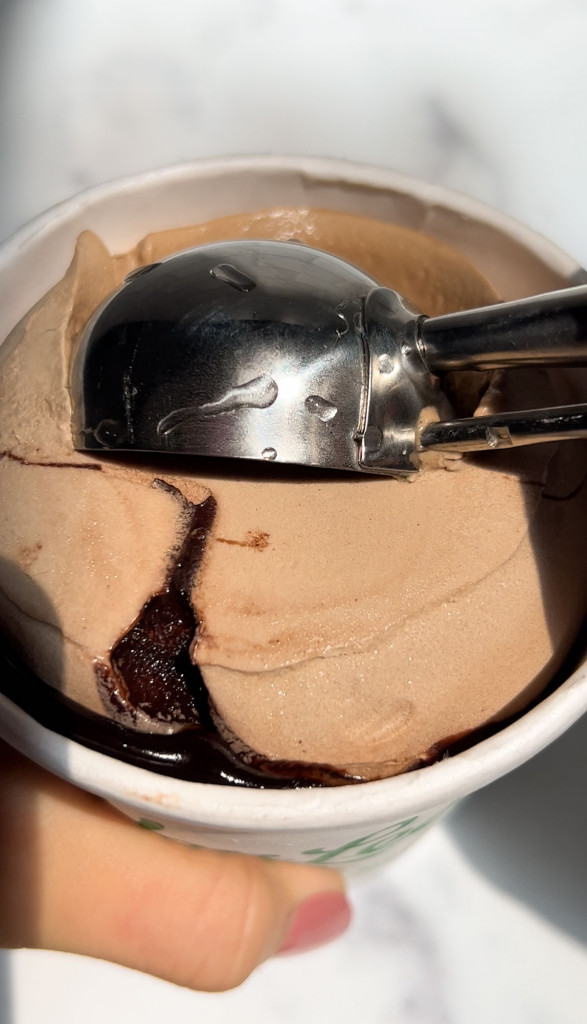
- You will also need 1 pint of dairy-free chocolate ice cream (or regular dairy ice cream, if you prefer).
Equipment needed
- large mixing bowl: make sure it's microwave-safe
- silicone spatula
- cupcake liners (optional): to place the ice cream balls into. You will then freeze the ice cream balls until it's time to put them inside the mochi dough.
How to make the mochi
Start by scooping out 9 balls of ice cream. I made mine about 1 inch in diameter.
Place the balls of ice cream on a baking sheet, or in cupcake liners, and place them in the freezer while you are preparing the mochi dough.

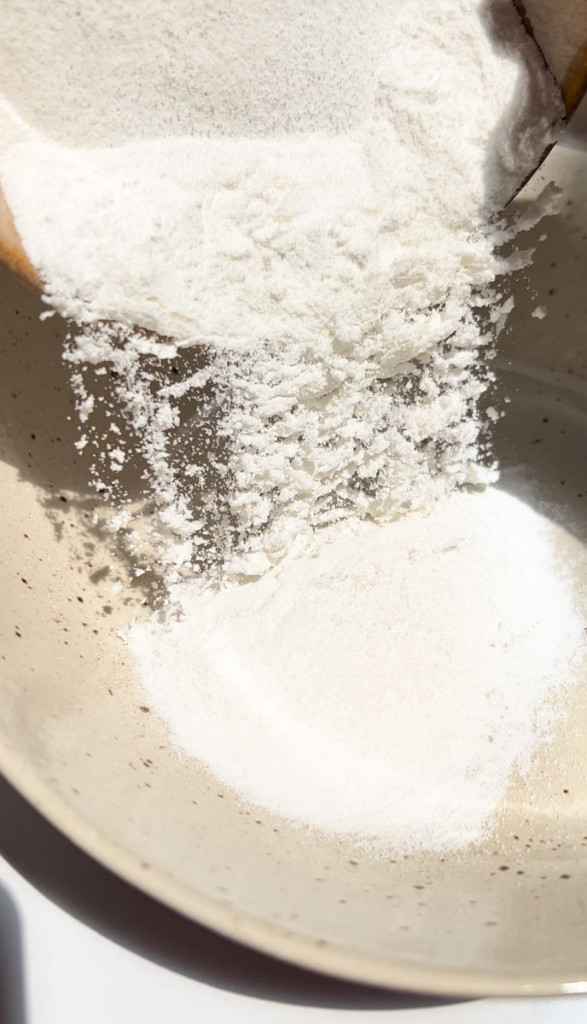
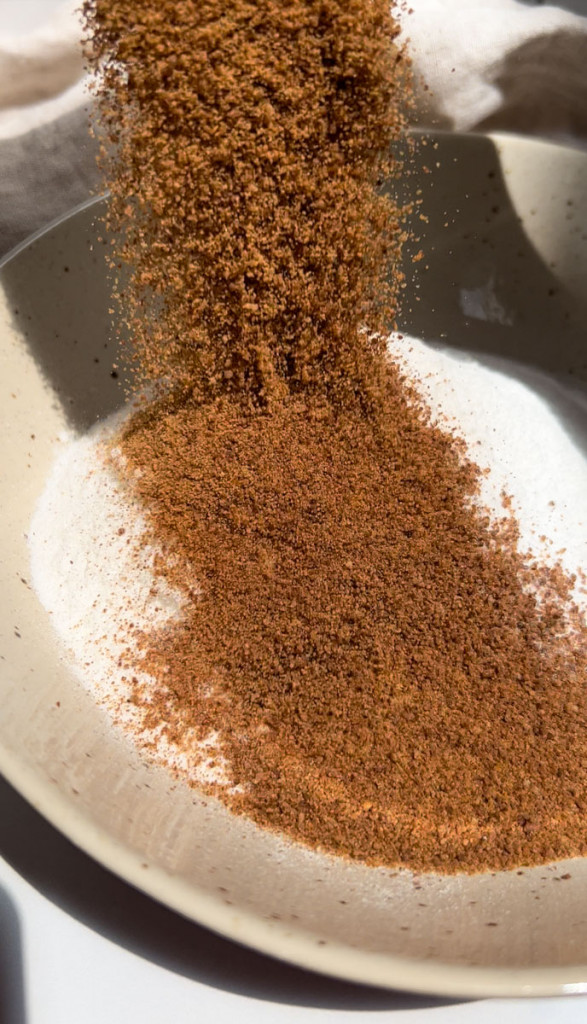
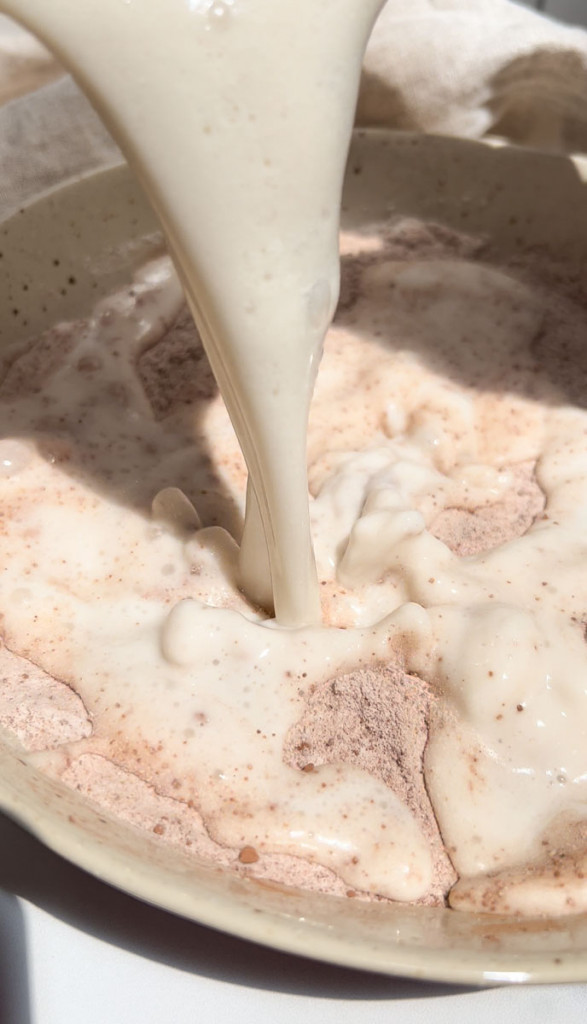
In a large, microwave-safe bowl, combine the sweet rice flour, sugar, cacao, and milk. Mix them well.

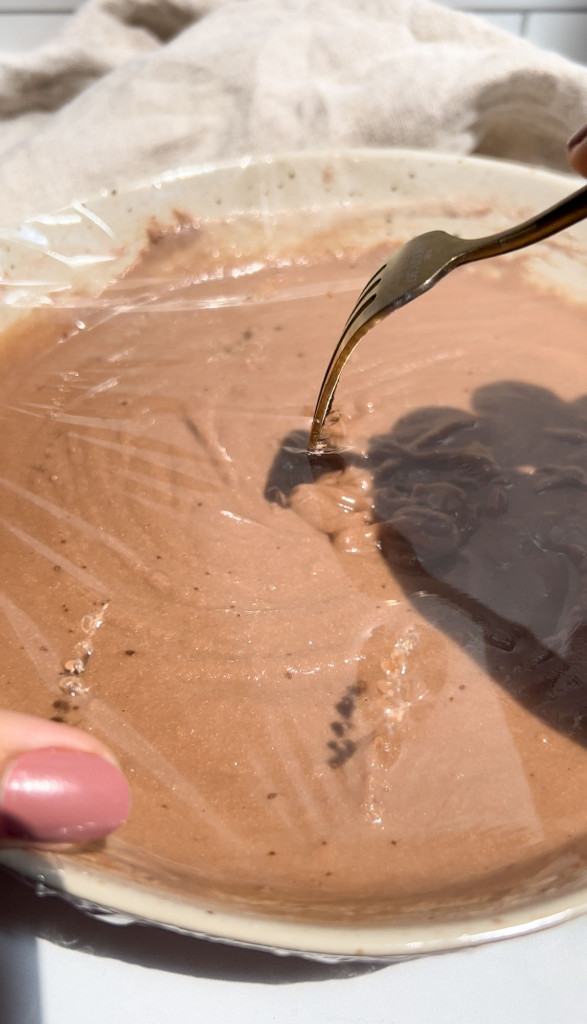
Cover the bowl with plastic wrap and poke some holes into it. Microwave the dough for 1 minute in the microwave.
Remove the plastic wrap, mix the dough with a spatula, then cover again and microwave for another minute. Repeat this three times in total.
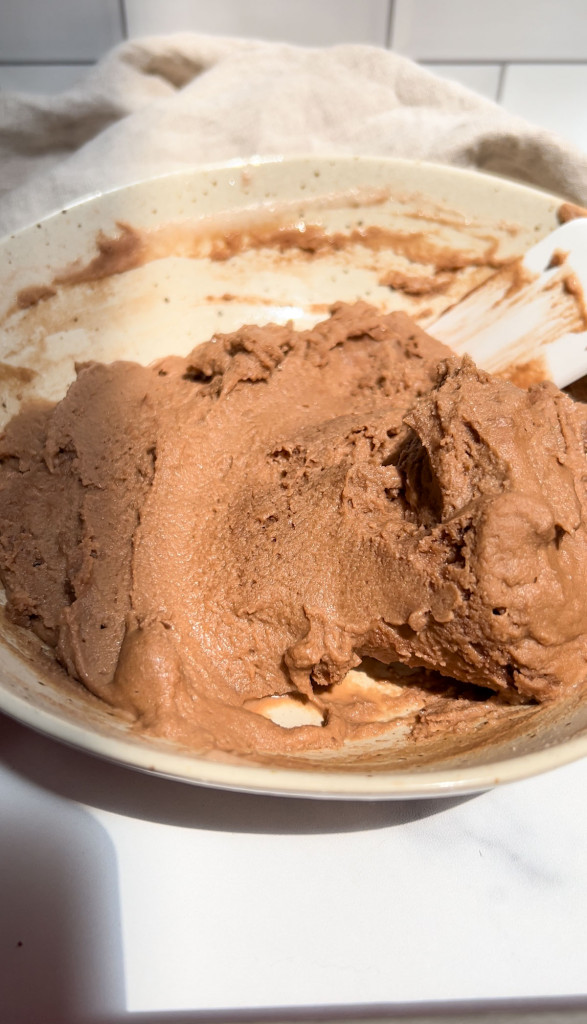
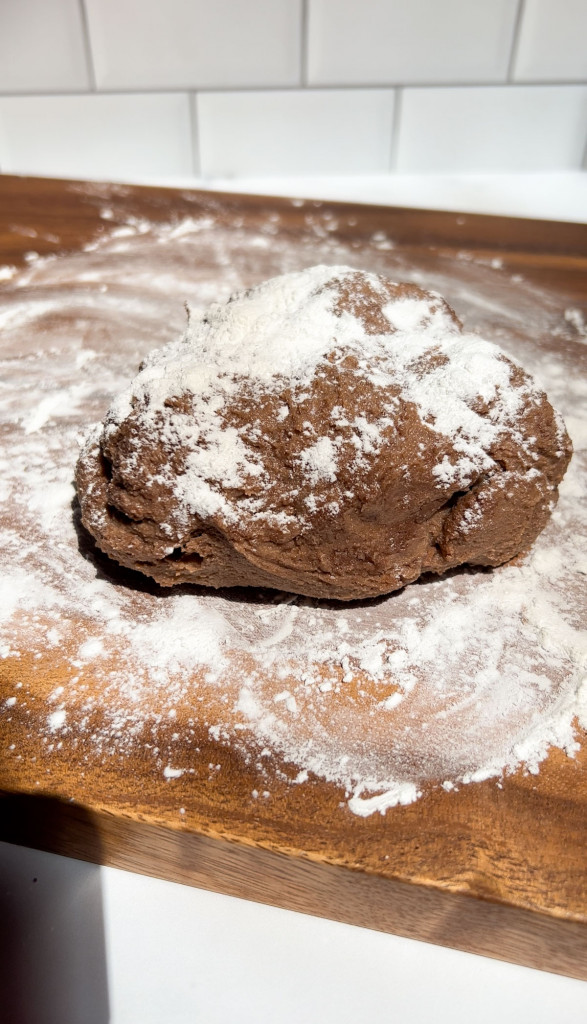
The mochi mixture should have formed a sticky dough. I like to place the dough in the freezer for 30 minutes to make it slightly less sticky.
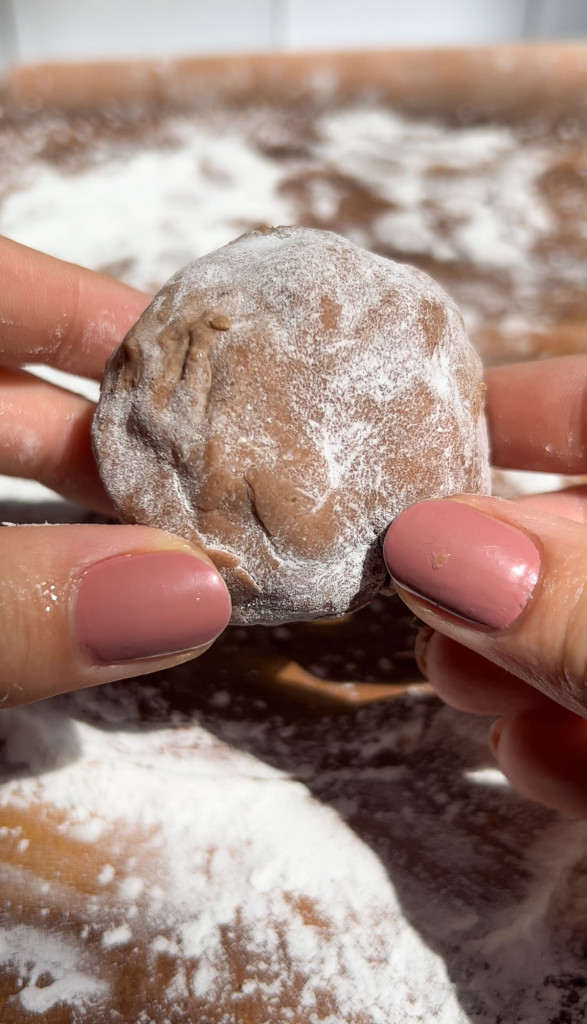
After the dough has chilled, generously flour your work surface with cornstarch (I really mean generously! The dough is very sticky).
Place the dough on the surface, and sprinkle another generous amount of cornstarch on top of the dough.
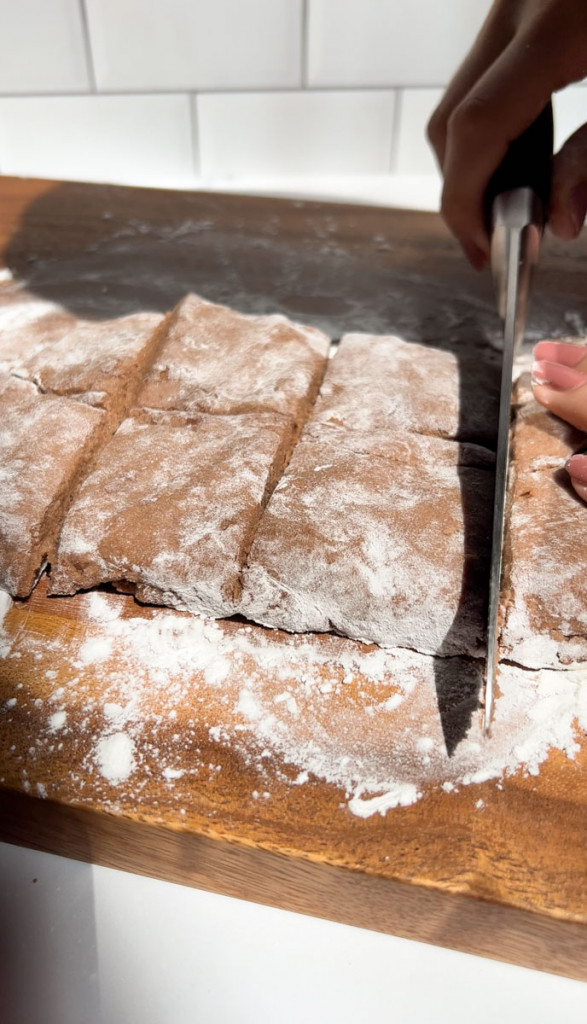
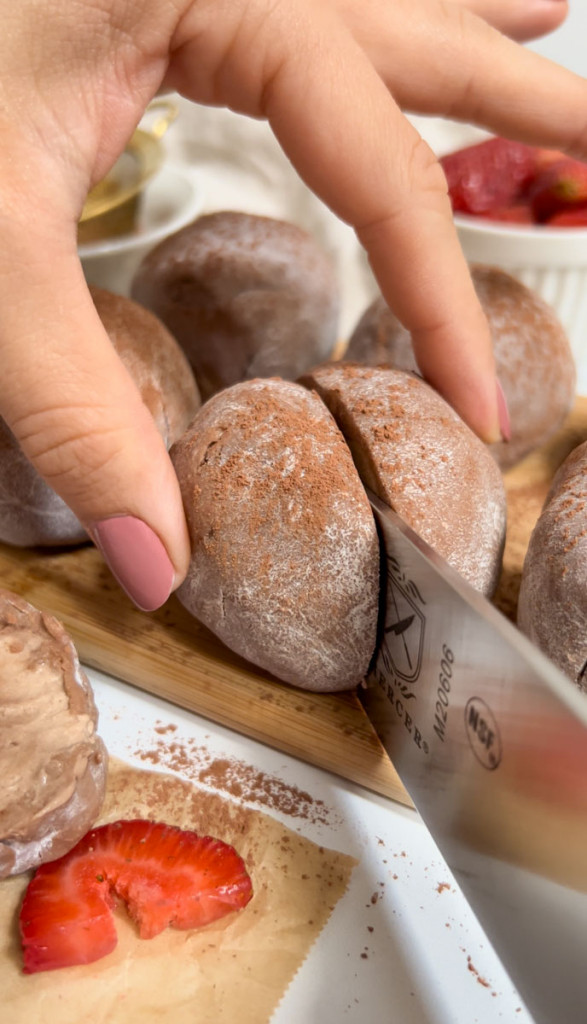
Using your hands or a rolling pin, flatten out the dough. Then use a knife to divide it into 9 squares that are about equal in size.
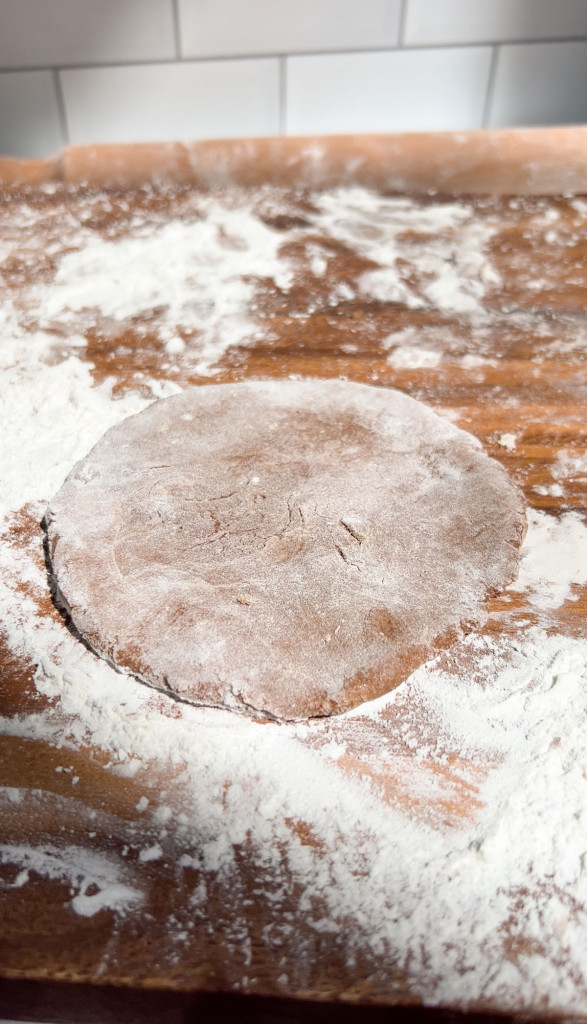
Take each dough ball and flatten it out until you have a dough round about 3 inches in diameter. Make sure you are using plenty of cornstarch so that the dough doesn't fall apart.
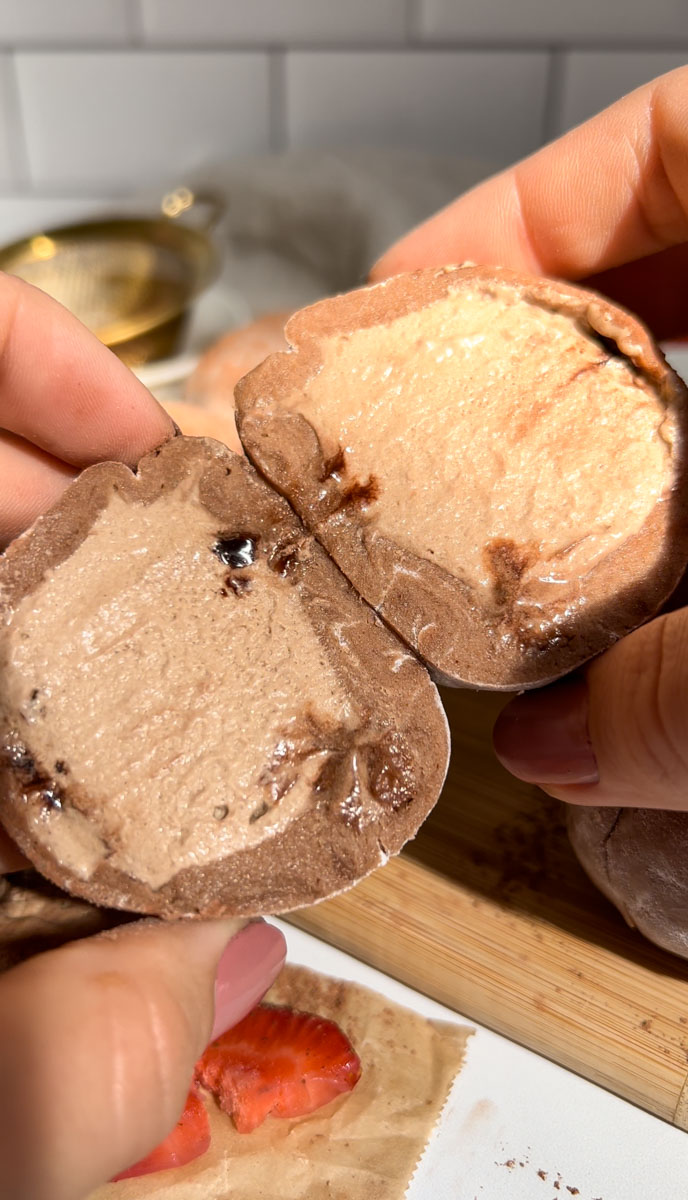
Take out the frozen ice cream scoops. Place an ice cream scoop in the middle of the dough ball and gently enclose the ice cream inside the dough until the ice cream is fully enclosed.
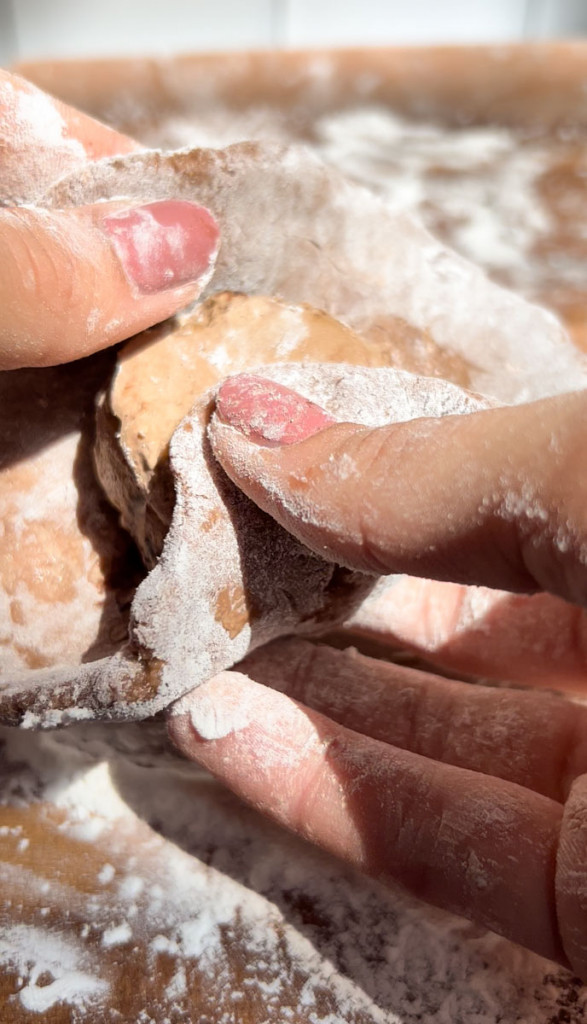
Repeat this for each chocolate truffle and immediately put them in the freezer once you make each one.
Freeze the chocolate balls for at least 30 minutes (or store them in the freezer for as long as you want to always have a yummy snack on hand!)
Video
If you liked this recipe, you might also like these other chocolate desserts
- 3 ingredient chocolate mousse
- chocolate truffle recipe
- chocolate protein pancakes
- vegan ice cream recipe
Chocolate Mochi Recipe
Ingredients
- 1 pint dairy-free ice cream
- 1 cup sweet rice flour sweet rice flour, (also called glutinous rice flour or mochiko is a special flour used for mochi. You can find it in the baking section of many grocery stores, or order it online.)
- ¼ cup sugar I used coconut
- 1 tablespoon cacao powder
- 1 cup dairy-free milk
- cornstarch to dust the flouring surface
Instructions
- Start by scooping out 9 balls of ice cream. I made mine about 1 inch in diameter.
- Place the balls of ice cream on a baking sheet, or in muffin liners, and place them in the freezer while you are preparing the mochi dough.
- In a bowl, combine the sweet rice flour, sugar, cacao, and milk. Mix them well.
- Cover the bowl with plastic wrap and poke some holes into it. Microwave the dough for 1 minute in the microwave.
- Remove the plastic wrap, mix the dough with a spatula, then cover again and microwave for another minute. Repeat this three times in total.
- The mixture should have formed a sticky dough. I like to place the dough in the freezer for 30 minutes so make it slightly less sticky.
- After the dough has chilled, generously flour a surface with cornstarch (I really mean generously! The dough is very sticky).
- Place the dough on the surface, and sprinkle another generous amount of cornstarch on top of the dough.
- Using your hands or a rolling pin, flatten out the dough. Then use a knife to divide it into 9 squares that are about equal in size.
- Take each dough ball and flatten it out until you have a flat disk (should look something like a mini pizza dough). Make sure you are using plenty of cornstarch so that the dough doesn't fall apart.
- Take out the frozen ice cream scoops. Place an ice cream scoop in the middle of the dough ball and gently enclose the ice cream inside the dough until the ice cream is fully enclosed.
- Repeat this for each mochi ball and immediately put them in the freezer once you make each one.
- Freeze them for at least 30 minutes (or store them in the freezer for as long as you want to always have a yummy snack on hand!)
- Enjoy your mochi!
Video
Nutrition
How to store the mochi
Mochi should be stored in an airtight container in the freezer. Since they are stored in the freezer, they can last for quite some time. I've stored them for 2-3 weeks myself. I'm sure they can last even longer, but they are so yummy that they tend not to!
Sandy
we tried these this weekend and they came out delish!
Gaby Dimova
so happy to hear that!! 🙂
Brad
If I don’t want to use ice cream, can I still use this recipe for regular chocolate mochi and replace the ice cream with a different chocolate filling?
Gaby Dimova
Hi there! That should work 🙂 Just as long as whatever you replace the ice cream with is solid! Otherwise wrapping it in the mochi will be really messy.